
I felt the need to add a little something to one of my “Heartfelt Trio” projects today. You know that feeling… when a panel or project is just missing something? After some experimenting, I decided to edge the appliqued heart I’d been working on with Threaded Backstitch. I was so happy with the result, so… who’s up for a little tutorial?
Threaded Backstitch is such an “easy to achieve” embroidery stitch. I use it in all sorts of ways. To embellish a quilt block, to trim applique shapes or as part of a stitchery design.

Firstly… how is it done?
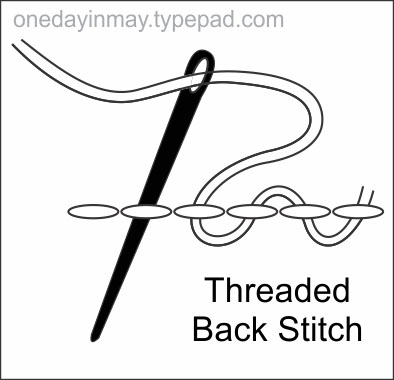
A row of simple backstitch is sewn along your traced line or the edge of an applique shape. Thread is then woven back and forth through the row of backstitch to create an overall wavy look.
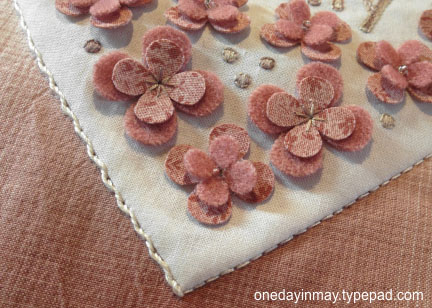
Here’s a closer look at what I was working on today…
I’m hoping for quite a bulky look to edge my heart shape. I would like the waviness of the heart edge to be a little noticeable from a distance and I’m also hoping to give the impression of a slightly lacy edge. I’ve chosen the number of strands I think will give that look… its always a bit of an experiment.
Note ~ you can achieve a finer or “chunkier” look by varying the number of strands you use in the “backstitch base” and also in the “threaded stitches”. My usual choice for most applications is 3 strands for the base and also 3 strands for the threaded stitches.

– With your chosen number of strands of stranded cotton (I’ve used 2 strands), sew medium sized backstitch all the way around the applique shape. Try to keep your stitches evenly spaced.
– Now thread your needle again, with the number of strands you’d like to weave through the backstitch base. (I’ve used 6 strands) At the base of your first backstitch, bring your thread from the back of your work to the front.
– Weave the 6 strands back and forth through your “backstitch base”, taking your needle under the stitches. In the above pictures, see my needle going under the first backstitch from left to right. I place the needle under the following stitch from right to left. Alternate in this way along the entire length of backstitching. Take care that you don’t pull the woven thread too firmly, as this will straighten out the little bumps that give such a nice wavy effect.
Below, you can see my row of “Backstitch Base” on the right. On the left is my finished Threaded Backstitch.
I also like to use Threaded Backstitch, when I need a stem to look a little thicker than a regular backstitch. In Hannah’s Garden and Hannah’s Heart, I’ve used it to embroider the branch detail in the bird panels. The variegated thread adds yet another dimension as the tone of the top thread and bottom thread can vary.

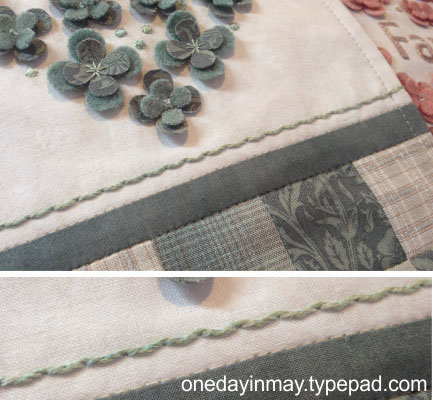
Threaded Backstitch is also useful at the edge of a panel or quilt block. It brings a simple embellishment to the block that doesn’t take away from the overall design.
A little hard to see here as I’ve used ecru thread on off white linen. Threaded Backstitch trims the butterfly and bee panels of Hannah’s Garden.

I also added it to another of my Heartfelt Trio projects… a little leftover variegated thread now trims the top and bottom of the central panel.
One day, I’d also like try this simple technique to stitch cursive script… one day. I hope you’ll give Threaded Backstitch a go.
Let me know if you like it.
Happy stitching,

Your examples are so gorgeous. Thank you for sharing.
that is brilliant! thank you for sharing that – it just solved a problem I was having with a small piece of stitchery (marked the lines a bit too aggressively) and will add a beautiful touch to the piece as well.